By Rob Robinette
If you have to cut a brake line you will have to double-flare it to
connect it to a flare pipe fitting. You'll need a pipe cutter ($7 Home Depot) and a
double-flare tool ($40 Pep Boys).
Put the pipe cutter on the brake line where you want to cut it. You
may have to release one end of the line to allow you to gently bend it up enough to get
the pipe cutter on and spin it around. Gently tighten the knob on the cutter and then spin
the cutter around the pipe about three times and then tighten the knob a little more and
repeat then repeat these steps until the line breaks in two.
The stock RX-7 brake lines have a protective black plastic coating
that will have to be removed before the flare nut will slip over the line. You will need
to remove about 1 1/4 inches of the coating on each tube end so you will be able to slide
on the flare nut far enough to allow the pipe flare tool to grip the pipe. After you cut
off the coating you will have to use sandpaper to remove the thick green paint and
adhesive that's below the black coating. Once you can slide the flare nut on the tube
enough to get the flare tool clamp on you're golden.
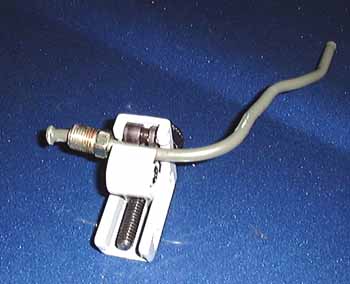
Using pipe cutter to remove metric
flare nut
Follow the directions to use the double-flare tool. You will need to
smooth out the outer edge of the pipe with a file and use a deburring tool (or a large
drill bit) to smooth out the inside edge of the pipe.

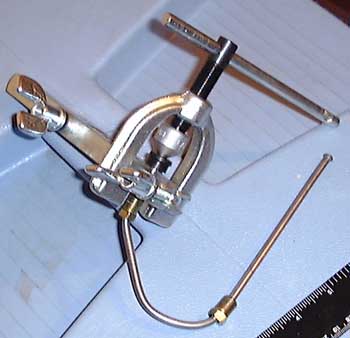
Double-flare tool with pipe
clamped, ready to flare (note both flare nuts are in place on pipe)
REMEMBER TO PUT THE FLARE NUT ON THE PIPE BEFORE YOU FLARE IT OR YOU
WILL HAVE TO CUT OFF YOUR NICE NEW FLARE AND START OVER! Put the flare tool's pipe clamp
on using its 3/16 inch hole, expose the required amount of pipe, clamp it down, attach the
3/16 inch adapter, screw it down on the pipe while watching the pipe to make sure it
doesn't slide out of the clamp, back out the clamp and remove the adapter, then finish the
double-flare by screwing down the flare tool into the pipe. It's easier than it sounds,
just follow the directions that come with the tool. Repeat for the other brake line end.
If you screw up the brake line you can buy pre-fabricated 3/16 inch brake lines of various
lengths at an auto parts store, you just have to bend them to fit. They are
pre-flared and have the metric or standard flare nuts already installed.
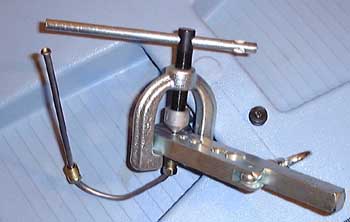
Making the first part of the
double-flare with the adapter
Blow some WD-40 or other solvent through your short line and then
blow compressed air through the line to dry it out. Push the brake pedal a little to flush
some brake fluid through the line coming from the master cylinder-this must be done to
remove any debris that got into the line during cutting, sanding and flaring.
Making the second part of the
double-flare without the adapter
Warning
You must torque the brake line nuts to 113-190 inch
pounds! (about 10-15 foot pounds) If you don't you run the risk of having a nut come lose
and dump all of your brake pressure which will result in total brake loss! (The parking
brake may still work)
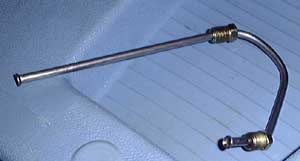
The finished brake pipe with flares
at both ends (for the 929 master cylinder install)
After you get it installed you'll need to bleed the brakes. See the Bleed Brakes
how to.
Rob Robinette
|